Disclaimer
My project uses autotiles and animated pieces, hence some code may seem a bit overkill for your use case.
You can support us through Patreon or get access to the final version of the code on GitHub
1. Drawing the board
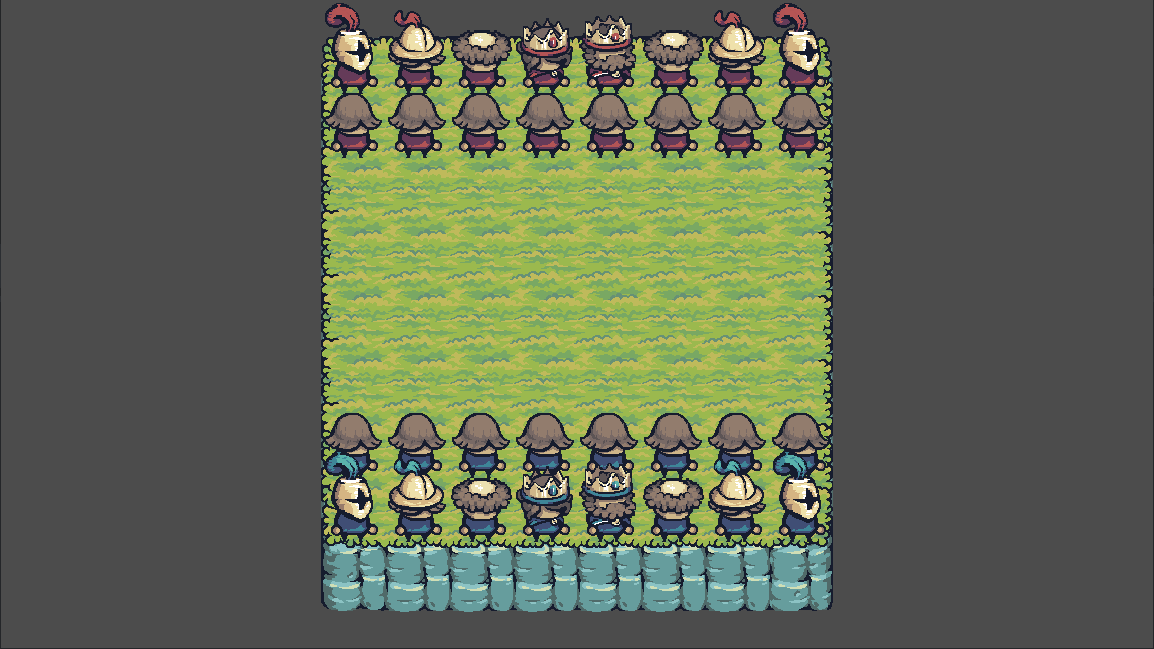
First you will need to setup a autotiler in order to draw the board and have those nice and crispy edges. I used BetterTerrain to have more control of the TileMap and the Tiny Swords asset pack.
Then start populating the TileMap with respective cells
var map_shape = Vector2i(8, 8)

# set background of map
for col in range(map_shape.x):
	for row in range(map_shape.y):
		var map_cell = Vector2i(col, row)
		BetterTerrain.set_cell(self, DrawLayers.TERRAIN, map_cell, AutotilerLayers.GROUND)
		BetterTerrain.update_terrain_cell(self, DrawLayers.TERRAIN, map_cell)
You can also center the TileMap by doing
# center map
var viewport_center = get_viewport().size / 2
viewport_center -= (map_shape * tile_set.tile_size) / 2
position = viewport_center - Vector2i(0, rendering_quadrant_size/2)
2. Defining chess pieces
2.1. Defining Piece Constants
What I did here is that I first created a Constrants.gd preload file that I used to store information about chess pieces and also general stuff that should not change in-game.
You can then store information inside of it such as the sprites that will be used for each individual piece such as
var UNITS = {
	"pawn": {
		"sprites": {
			"head": preload("res://assets/units/components/Head/HeadPawn.png")
		}
	},
	"rook": {
		"sprites": {
			"head": preload("res://assets/units/components/Head/HeadRook.png")
		}
	},
	...
2.2. Creating a Piece Template
We can then create a Unit.tscn class that we’ll use as a template to create chess pieces. The structure should look something like this
Unit (Node2D) # root of the scene
|__ Sprites (Node2D) # in charge of applying changes on sprite components
	|__ LeftArm (Sprite2D)
	|__ Body (Sprite2D)
	|__ Head (Sprite2D)
	|__ RightArm (Sprite2D)
|__ AnimationPlayer (AnimationPlayer)
Then we add some code to the Unit node
extends Node2D

@onready var sprites = $Sprites

var unit_type = "pawn"
var unit_side = "blue" # sides are blue (white) and red (black)

func init(unit_info):
	unit_type = unit_info["unit_type"]
	unit_side = unit_info["unit_side"]

func _ready():
	sprites.update_sprites(
		Constants.UNITS[unit_type]["sprites"],
		Constants.PALETTES[unit_side]
	)
2.3. Changing Colors using Shaders
You may have seen that I’m calling the Sprites node with a extra variable called Constants.PALETTES. That’s because I swap the palettes of a sprite at run-time to make blue pieces and red pieces.
I’ve added the following shader to the Sprites node and told all it’s children to use the parent material
shader_type canvas_item;

uniform vec4 old_main_color : source_color;
uniform vec4 old_shadow_color: source_color;
uniform vec4 old_light_color: source_color;

uniform vec4 new_main_color : source_color;
uniform vec4 new_shadow_color: source_color;
uniform vec4 new_light_color: source_color;

void fragment() {
    vec4 current_pixel = texture(TEXTURE, UV);

    if (current_pixel == old_main_color) {
		COLOR = new_main_color;
	}

	if (current_pixel == old_shadow_color) {
		COLOR = new_shadow_color;
	}

	if (current_pixel == old_light_color) {
		COLOR = new_light_color;
	}
}
You can then change the colors programmatically inside the Sprites node by doing
func update_palettes():
	var default_palette = Constants.DEFAULT_PALETTE

	material.set_shader_parameter("old_main_color", default_palette["old_main_color"])
	material.set_shader_parameter("old_shadow_color", default_palette["old_shadow_color"])
	material.set_shader_parameter("old_light_color", default_palette["old_light_color"])

	material.set_shader_parameter("new_main_color", color_palette["new_main_color"])
	material.set_shader_parameter("new_shadow_color", color_palette["new_shadow_color"])
	material.set_shader_parameter("new_light_color", color_palette["new_light_color"])
3. FEN and board setup
FEN (or Forsyth–Edwards Notation) is a way to encode the state of a chess board using letters for pieces (p or P for black and white Pawns, n or N for black and white Knights) and numbers for empty spaces.
Thus, you can encode for example the initial state of a chess board by writing
var start_FEN = "rnbqkbnr/pppppppp/8/8/8/8/PPPPPPPP/RNBQKBNR"Then you just need to split by / and parse the substrings to setup the board. Easy!
func get_unit_info_from_symbol(symbol: String):
	var unit_type = null
	match symbol.to_lower():
		"p": unit_type = "pawn"
		"n": unit_type = "knight"
		"r": unit_type = "rook"
		"b": unit_type = "bishop"
		"q": unit_type = "queen"
		"k": unit_type = "king"
	var unit_side = "blue" if symbol.capitalize() == symbol else "red"
	var unit_info = {
		"unit_type": unit_type,
		"unit_side": unit_side
	}
	return unit_info
You can even use this notations to add a re-play system to your games.